Channel management
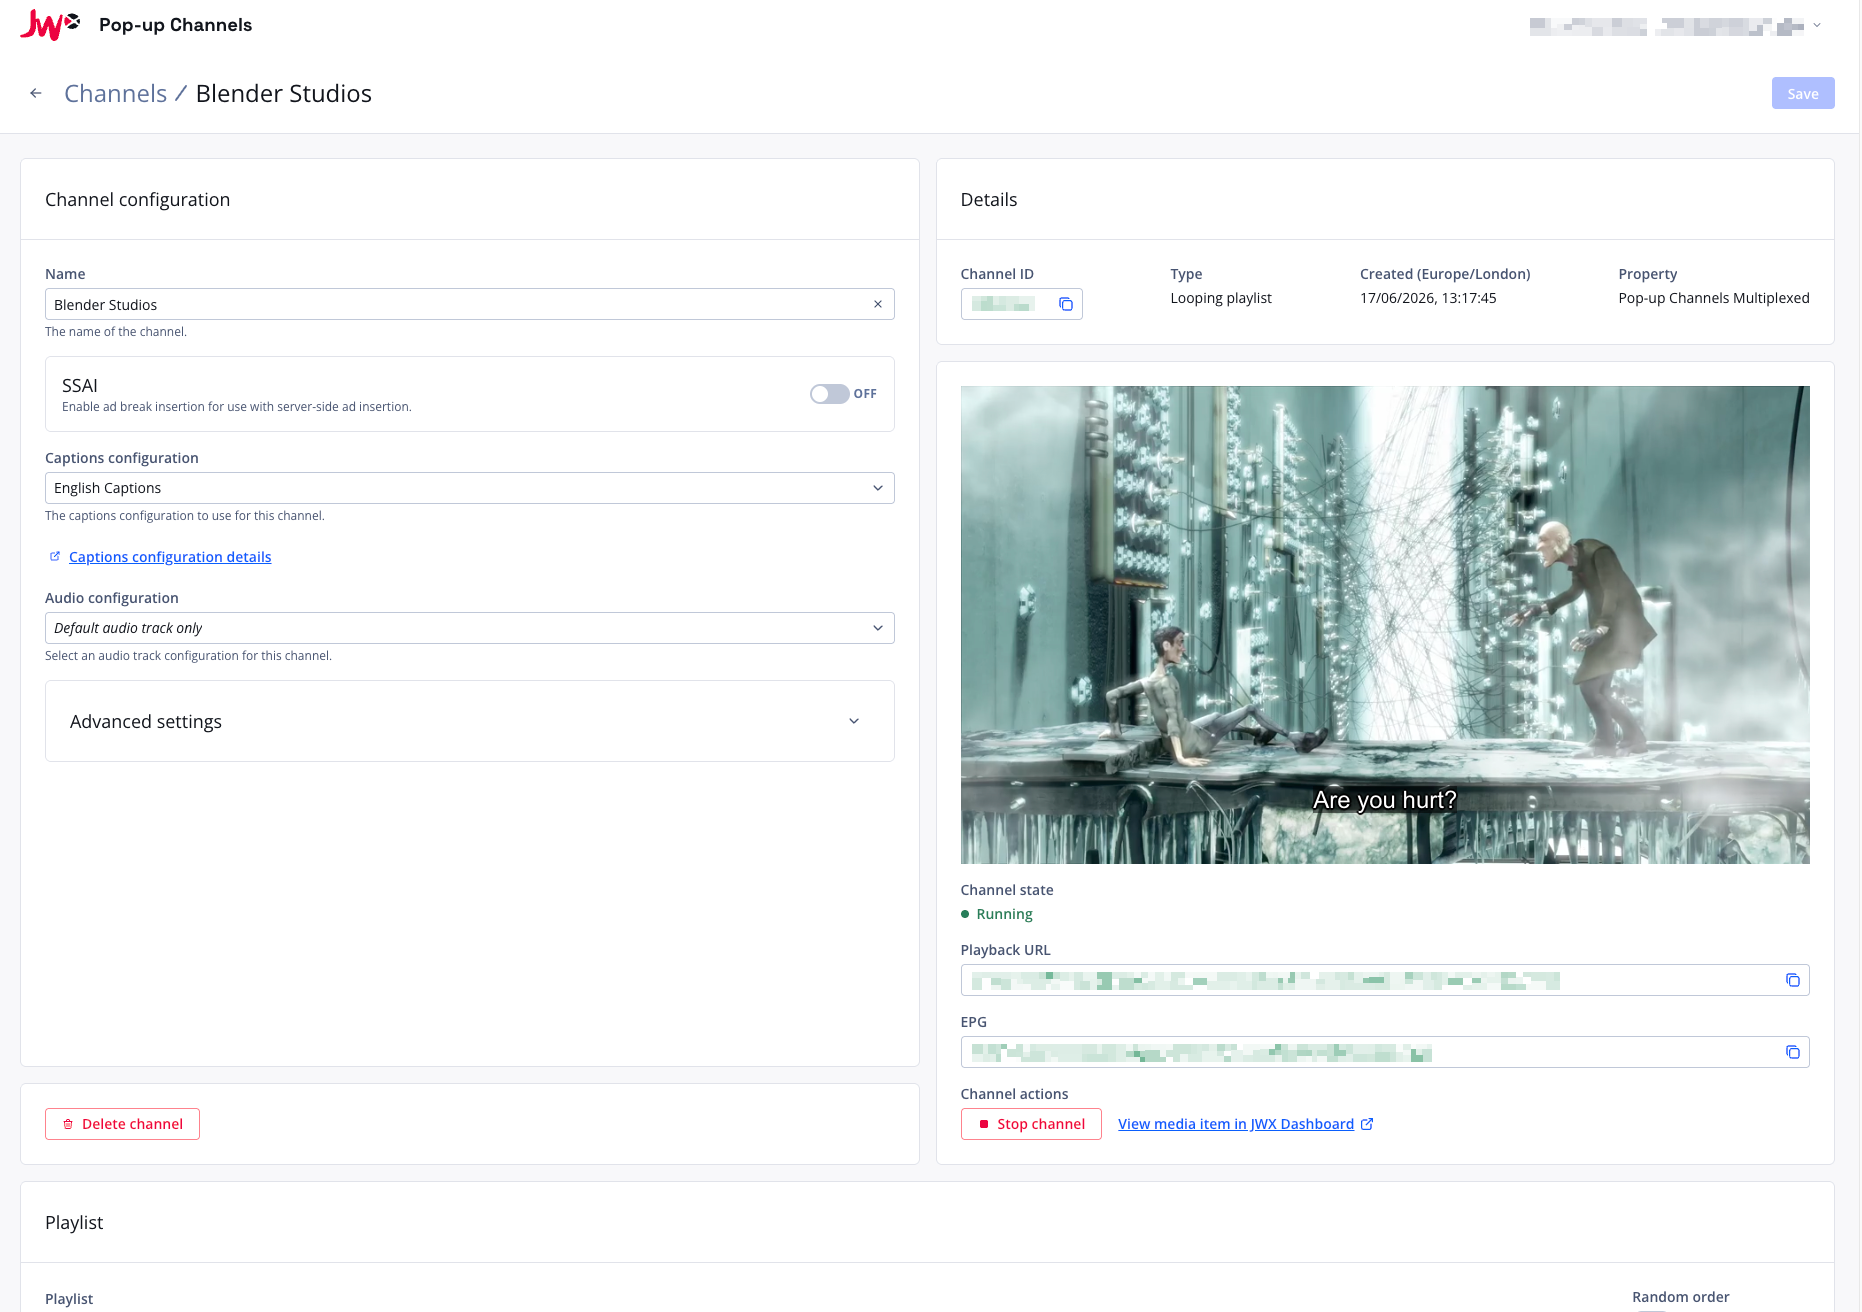
Using the Pop-up Channels front-end, you can create, preview, update and delete your channels.
Creating a channel
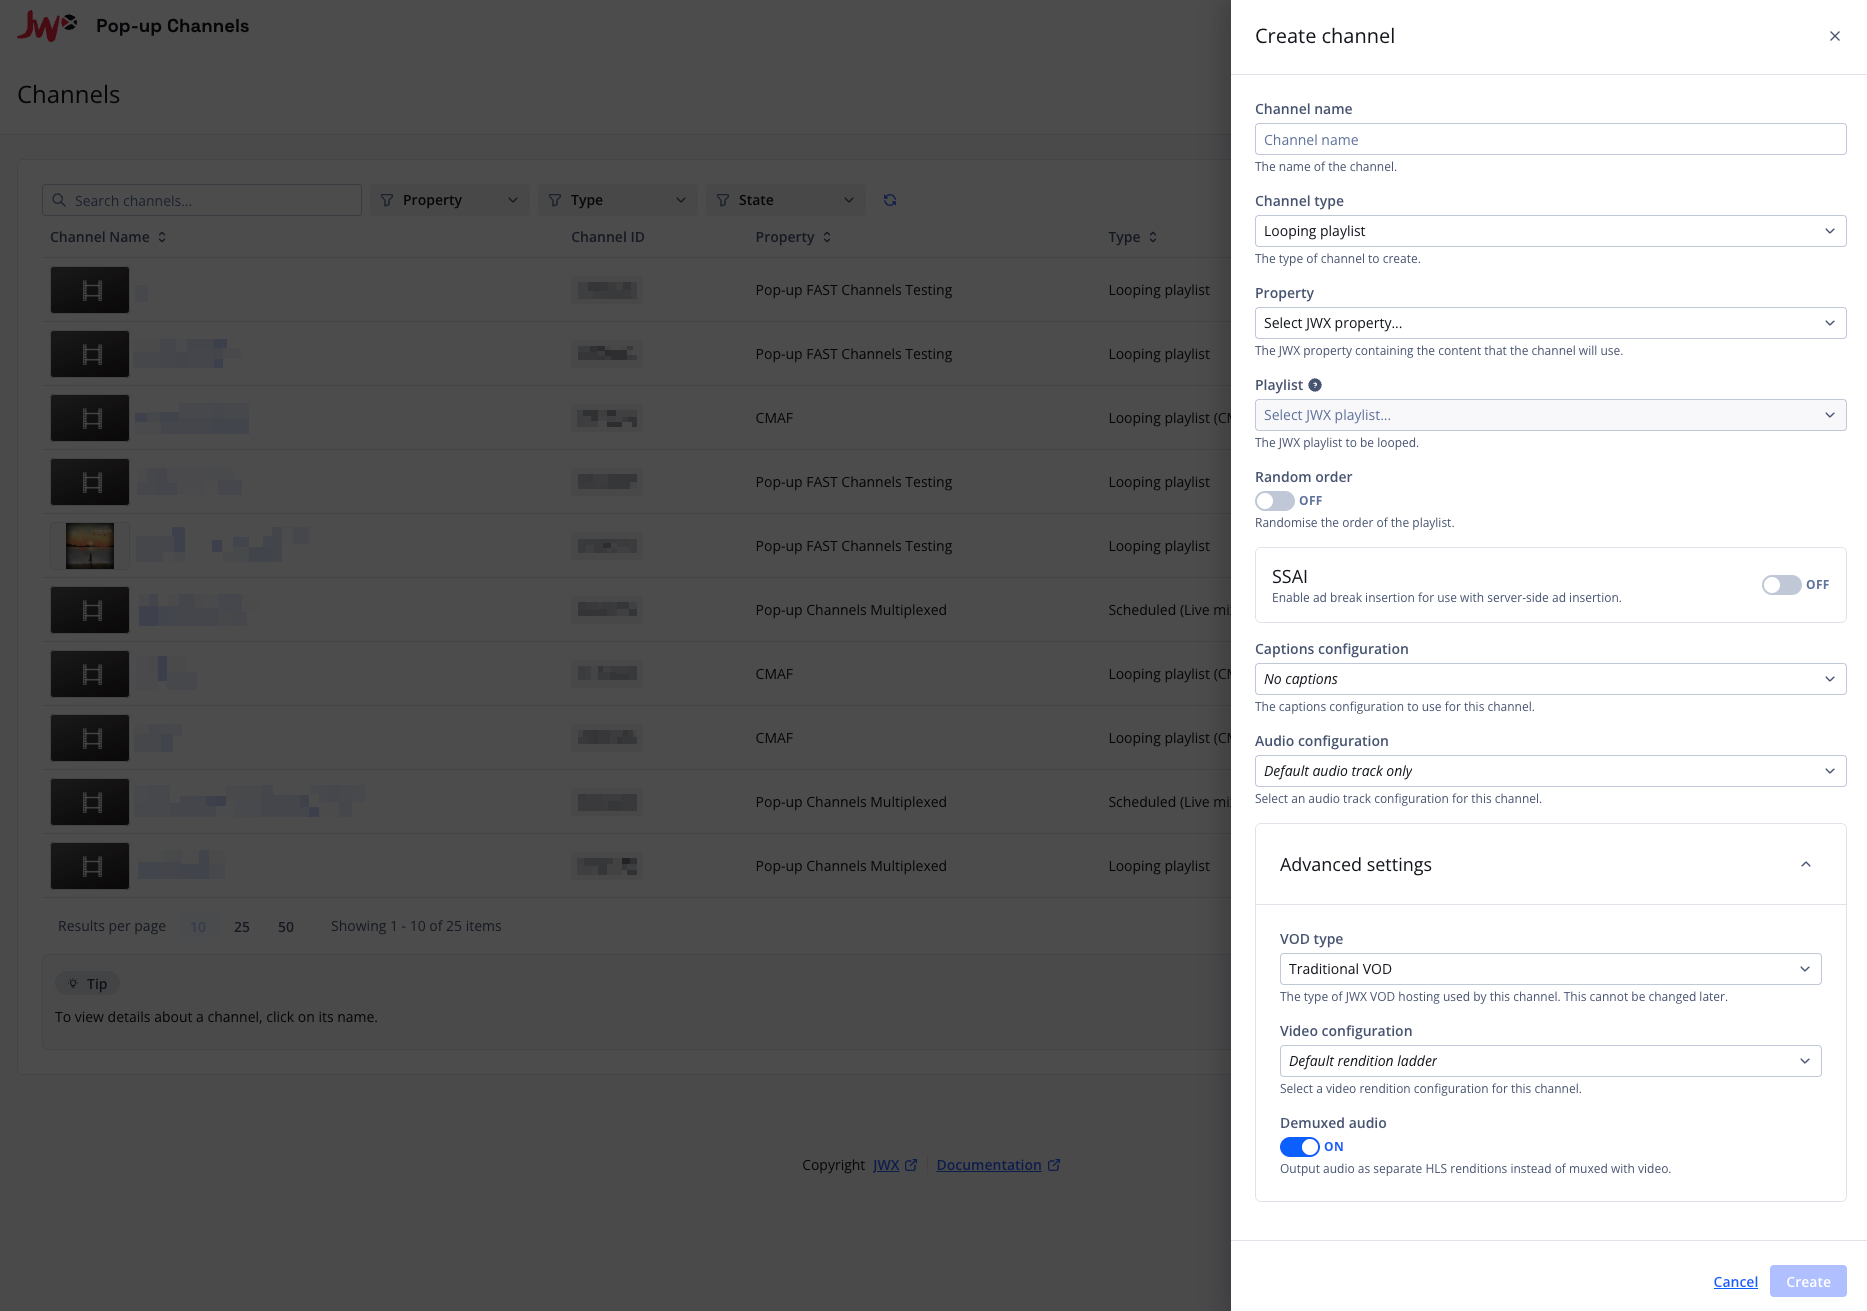
In the Pop-up Channels dashboard, you can easily create a looping playlist or scheduled channel.
When you create a channel, a media item containing the HLS stream is created in your JWX property, allowing you to seamlessly integrate with your apps. This media item will have the same ID as the channel.
Looping playlist
To create a looping playlist channel:
- Navigate to the channels page of the Pop-up Channels front-end
- Click the "Create channel" button in the top right
- Under "Channel name", enter a channel name
- Under "Channel type", choose "Looping playlist"
- Under "Property", select the JWX property that your content is on
- Under "Captions configuration", select the captions configuration to use, or "No captions" if the channel should not have captions
- Under "Audio configuration", optionally select an audio configuration to deliver multiple audio tracks, or leave it as "Default audio track only"
- Under "Playlist", select the JWX playlist you would like to use
- Can be a manual or dynamic playlist
- The playlist must be in the same property as your channel
- Optionally, enable "Random order" to shuffle the playback order of the playlist
- If you would like to enable SSAI:
- Under "SSAI", click the toggle to "on"
- Under "Ad Config", select your JWX ad config
- Under "Ad Slate", select a JWX VOD to use as a slate. Please note:
- The length of this slate will determine the length of your ad breaks.
- The ad slate must be in the same property as your channel.
- Optionally, enable "VOD preroll" to insert an ad break before each VOD in the channel
- Optionally, under "Advanced settings":
- Set the "VOD type" to "Traditional VOD" or "CMAF VOD". This cannot be changed after the channel is created
- Select a video configuration to control which video renditions are delivered, or to make the channel audio-only
- Enter a "BYOCDN Config ID" to have this channel's content delivered from your own CDN (only shown when BYOCDN is enabled for your account - contact support to enable it)
- If the selected property has DRM enabled, select a DRM policy to use for the channel
- Click "Create" to create the channel
Scheduled
To create a scheduled channel:
- Navigate to the channels page of the Pop-up Channels front-end
- Click the "Create channel" button in the top right
- Under "Channel name", enter a channel name
- Under "Channel type", choose "Scheduled"
- Under "Property", select the JWX property that your content is on
- Under "Captions configuration", select the captions configuration to use, or "No captions" if the channel should not have captions
- Under "Audio configuration", optionally select an audio configuration to deliver multiple audio tracks, or leave it as "Default audio track only"
- Under "Slate", select a JWX VOD to use as a slate when there is no VOD scheduled
- The slate must be in the same property as your channel
- If you would like to enable SSAI:
- Under "SSAI", click the toggle to "on"
- Under "Ad Config", select your JWX ad config
- Under "Ad Slate", select a JWX VOD to use as a slate. Please note:
- The length of this slate will determine the length of your ad breaks.
- The ad slate must be in the same property as your channel.
- Optionally, enable "VOD preroll" to insert an ad break before each VOD in the channel
- If you would like to enable live mixing:
- Ensure the channel type is set to scheduled
- Enable the "live mixing" toggle (this cannot be changed after channel creation)
- Optionally, under "Advanced settings":
- Set the "VOD type" to "Traditional VOD" or "CMAF VOD". This cannot be changed after the channel is created
- Select a video configuration to control which video renditions are delivered, or to make the channel audio-only
- Enter a "BYOCDN Config ID" to have this channel's content delivered from your own CDN (only shown when BYOCDN is enabled for your account - contact support to enable it)
- If the selected property has DRM enabled, select a DRM policy to use for the channel
- Click "Create" to create the channel
A channel uses a single VOD type, chosen at creation and fixed afterwards. CMAF VOD channels always use demuxed audio, and a channel cannot mix Traditional and CMAF VODs. See limitations for details.
Preview a channel
To preview a channel and view its details:
- From the channels page of the Pop-up Channels front-end, click the name of the channel
- You can preview the channel in the player on the right of your screen
Embed a channel
To embed a channel, you can use its HLS playback URL:
- From the channels page of the Pop-up Channels front-end, click the name of the channel
- On the right of the screen under "Playback URL", you can retrieve the HLS playback URL
- You can then use this URL to embed the channel on your website or apps
Channel details
To view or update a channel's details:
- From the channels page of the Pop-up Channels front-end, click the name of the channel
- On the left of your screen you can see:
- Channel name
- Captions configuration
- Audio configuration
- Video configuration
- SSAI toggle
- Ad config ID
- Ad slate
- VOD preroll
- Minimum time between prerolls
- For looping playlist channels:
- Playlist title
- Playlist ID
- Random order toggle
- Playlist preview
- For scheduled channels:
- Slate
- Filler playlist
- Button to access scheduler
- DRM policy (if the channel's property has DRM enabled)
- On the right of your screen you can see:
- Channel ID
- Channel type (looping playlist or scheduled)
- VOD type (Traditional or CMAF)
- Live mixing (for scheduled channels)
- Created date in your timezone
- Property ID
- Channel preview
- Channel state (creating, starting, running, stopped, deleting or failed)
- HLS playback URL
- SSAI playback URL (if SSAI is enabled)
- EPG URL
- Link to the channel's media item in the JWX Dashboard
The channel name, captions configuration, audio configuration, video configuration, SSAI settings, playlist ID, random order, slate media ID and filler playlist can be changed on this page.
The captions, audio and video configuration selectors can only be changed while the channel is stopped - see Start or stop a channel.
The VOD type cannot be changed after the channel is created.
Once you have made any changes you would like to make, you can click "Save" in the top right corner to save your changes.
Start or stop a channel
By default when you create a channel, it will be running. To stop or start a channel:
- From the channels page of the Pop-up Channels front-end, click the name of the channel
- On the right of your screen under "Channel actions", there is a button to start or stop the channel, depending on its current state
Delete a channel
To delete a channel:
- From the channels page of the Pop-up Channels front-end, click the name of the channel
- On the left of your screen there is a button to delete the channel